

When Reports is initially accessed in any job file, the Reports - Report dialog is automatically displayed. In this dialog the default option, Create Report, will create a "dynamic report" based on the contents of the project and the options selected in the dialog.
When a report is initially created, all pages in the report are of the same size. Variable page size may be specified in the Report Properties command in the Reports Toolkit.
The contents of the Dynamic Report are managed by proxies (placeholders). The proxies are automatically filled with content as available in the AGi32 model.
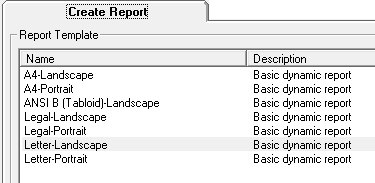
Report Template
The desired paper size and orientation are selected here. Current report formats (v19) are shown below.
Report Contents
- Summary: This will include the information specified by clicking on the Summary/Footer button and adding content as appropriate. See the topic Report Summary Information for more information.
- Luminaire Summary: This will include a page with Luminaire Summary schedule.
- Luminaire Images: This will include the luminaire image (if available from Instabase), the luminaire's polar plot (candela curves), and/or the LCS graphic, if selected.
- These schedules may be selected : Luminaire Location Summary, Expanded Luminaire Location Summary, Calculation Summary, LPD Area Summary, Room Surface Summary. Each schedule selected will have its own page in the report.
- If selected, Viewports will be included, one for each defined Viewpoint in Model Mode, and each on its own page in the report.
- If selected, Render Views will be included, one for each defined View in Render Mode, and each on its own page in the report.
Sub-Elements
- Banner
button - The user may select an image to be displayed at the top of each page. An example might be a company logo.
- If the selected banner image is larger than the size of its predetermined proxy (essentially, a placeholder), it will be sized down to fit, while maintaining the image's aspect ratio.
- If the selected banner image is smaller than the size of its predetermined proxy location, the proxy will be sized down to fit the image.
- Footer button - This button opens the Summary/Footer dialog (works the same as the Summary/Footer button described above). From there, you can set the Summary and Footer information. See the topic Report Summary Information for more information.
For additional information, click on the Procedures tab at the top of this topic.