
The Project Manager dialog box enables the user to add new projects to the job file and manage project entities.
Add a project to Project Manager
- From the Add
menu choose Project, or from the
Project toolbar click on the Project Manager button
 .
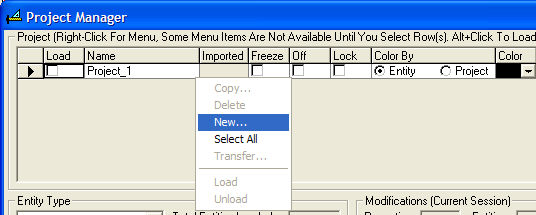
. - Right click in the Project table to display the
secondary menu. Select the New
option.
- Enter a project name in the New Project text box.
- Project Names must be unique.
- If you wish to create more than one new project, type all of the names, separated by commas.
- Click OK.
- The Project can be renamed at any time by clicking in the Project Name column.
Modify project entities in Project Manager
- From the Modify
menu choose Project - Project Manager,
or from the Project toolbar select .
- Load the projects you wish to modify (to load multiple projects, depress the Alt key while clicking in the Load selection box).
- Select the entity type you wish to modify - entities are displayed one type at a time (i.e. select either luminaires, objects, calculation points, rooms or drawing entities).
- Select the Entities you wish to change (to select multiples, highlight the rows including those entities) and make the corresponding changes.
- Click OK.
Note: Changes are applied instantly. You may visually see the changes by clicking the Preview button or cancel them by clicking the Cancel button.
Related Topics
Transferring Entities between projects