
The Add Calculations - Roadway command allows you to specify certain lighting metrics associated with roadway lighting applications in a straight segment of roadway. The resulting calculations are calculated based on the user’s selection of the roadway standard. AGi32 includes default input parameters for grid placement and point spacing based on five roadway standards in use around the world.
These standards are:
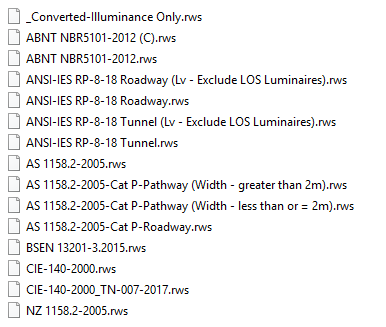
Click on the Concepts tab above for a table showing the metrics defined in each of these Standards.
Placing roadway calculations:
- From the Add
menu, choose Calculations - Road,
or in the Calculations Toolkit select
 .
.
- Specify a unique Label for the calculation grid, up to 32 characters long. The default label will be Road_1. Unless changed, subsequent labels will be Road_2, Road_3, etc. If a number is used for the label, subsequent labels will be incremented accordingly.
- An optional Description may be entered (up to 80 characters). Meaningful descriptions will be useful when generating schedules.
- Select the roadway standard you wish to use from the pull-down menu just below the Description field. AGi32 will use this to determine the observer position (if any) and the point spacing.
- On the left side of the dialog, indicate with a check mark the metrics that you wish to include. A separate grid will be created for each.
- Specify the Number of Lanes in the Direction of Travel and (if applicable) in the Opposite Direction. (Some standards considered the lanes in both directions; others consider only the lanes in the Observer's direction of traffic flow.) If there is a median, only specify the lanes in the Direction of Travel; use 0 for the number of lanes in the Opposite Direction.
- Check that the correct Driver's Side of Roadway is indicated. The default is right for RP-8 and CIE standards, and left for Australia, BSEN and New Zealand standards.
- The Point Spacing Along the Roadway may be a set value, or it may be based on the Number of Luminaire Cycles that the grid will cover, depending on the standard selected.
- Select the R-Table from the pull-down menu that best describes the roadway pavement. Several R-Tables are provided. The Actual Q0 Value is extracted from the selected R-Table but may be overridden by entering a different value.
- Specify the Summary options to calculate. The statistics called for by the chosen Standard are checked by default. Others may be selected as well.
- Select the display options, including precision (decimals displayed), text color, grid perimeter lines, lane and direction indicators, Observer position,grid points, and labeling.
- If desired, you may pre-specify the Z coordinates of the grid before exiting the dialog. You will also have the opportunity to change the Z coordinate of the grid while specifying the grid vertices in the graphics window.
- If desired, specify Isolines contouring and/or Highlight Values by clicking on the appropriate buttons on the right side of the dialog.
- Repeat Steps 10-13 if different values/settings are needed for each calculation type. Tip: For Veiling Luminance, you will want to select either Threshold Increment or Veiling Luminance Ratio in the Summary section.
- Click OK to return to the graphics window and place the roadway calculation grid(s).
- Locate the first point of the grid at the curb edge of the roadway so that it is lined up with a luminaire position and click the left mouse button.(To change the grid elevation at the start of the roadway, move the cursor into the Z-Coord text box and enter a new value, or use the up and down arrow keys on the keyboard, before clicking the first point.)
- Drag the cursor to the second point on the grid, along the curb line, and left click again. Important: The order in which the points are entered determines the direction of the flow of traffic. Traffic flows along the roadway from point 1 to point 2. For example, to consider traffic flowing in an eastward direction, click the first 2 points on the curb line from left to right. (To change the grid elevation at the end of the roadway, move the cursor into the Z-Coord text box and enter a new value, or use the up and down arrow keys on the keyboard, before clicking the second point. This allows you to tilt the roadway in the direction of traffic flow.)
- Drag the cursor to the 3rd point on the road. This point defines the roadway width. Note: For RP-8, the roadway width is defined for one direction of traffic flow only. For the other standards, the width is the entire roadway (carriageway) unless there is a median.
Note: Once a Visibility Level (VL) grid has been created (for RP-8 standard), the individual grids may not be deleted separately in Project Manager. Visibility Level calculations require the roadway luminance, background luminance and veiling luminance results, thereby tying all the grids together.
The Roadway Luminance, Veiling Luminance, and Visibility Level (STV) grids represent the calculation points for a single directional flow of traffic. To consider the entire roadway, a calculation grid should be created for each direction of traffic flow. The directional flow of traffic is determined by the specified order of the curb points defining the length of the roadway. Traffic flows in the direction of first point to second point. The third point defines the width of the roadway from curb to curb in one direction of traffic flow.
Tunnels: The roadway luminance calculations can take reflective or obstructive entities around or within the luminance grid into account, per RP-8-18 (old RP-22) recommendations for tunnels. This is also true for the associated illuminance and veiling luminance calculations.
Consideration of Surfaces in Roadway Calculations:
- Surfaces that are to be included in Full Radiosity Calculations must be assigned a special surface type (Roadway Contributor or Roadway Pavement) if reflected light is to be considered. Surfaces that are not one of the two Roadway surface types will be considered obstructive only (blocking light but not reflecting light). If the Full Radiosity Calculation command is initiated with non-roadway surfaces present, a Warning will be displayed, showing which surfaces comply and which do not and offering the option to continue or abort the calculation.
- Surfaces may be composed of 3D Entities imported into AGi32 or made with AGi32's modeling entities. In either case, the existing surfaces may be modified in AGi32 with the Edit Object command (select the entity and then select the Surface Edit button in the Edit dialog) or by using the Surface Edit command to select the entities.