Schedule Field Properties
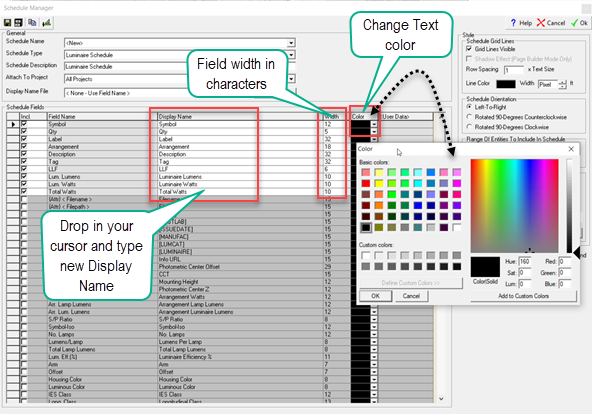
The Schedule dialog allows you to change each selected field's Display Name, Width and Text Color. If the field Width is shorter than the associated contents, the text inside the field will be truncated.
Field Name - The Name of the selected Field. This field links the schedule to the associated section of the AGi32 database, and cannot be modified: if you wish to use a name that is different than the default, change the Display Name cell's contents. Exception: The Field Name is modifiable with user-defined fields located at the bottom of the list of fields for each schedule.
Display Name - The field's heading name that will be displayed in the schedule. By default, this is the same as the Field Name, but it can be changed by editing the Display Name field directly or by choosing a Display Name File that contains information on the desired changes. For example, you may choose to display the names of the selected fields in a language other than English. Currently, Spanish, French and Portuguese are available. This is done by clicking the down arrow next to the Display Name File field and selecting the language desired. You can also create your own Display Name File with assigned Display Names that are different from the Field Names. For more information on Display Name Files and how to create your own, see the Display Name topic.
Field Width - The width in number of characters of the selected field. Fields default to the maximum character length that can be specified in the associated AGi32 dialogs.
Field Color - The text color of the contents and the heading of the selected field. By default, this color is black.

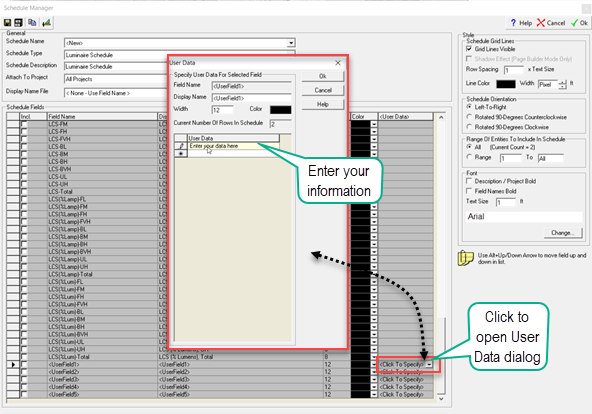
User Data - If a user-defined field (e.g., <UserField1>) is selected, you can enter the value to be displayed in the field by clicking in the <User Data> field and then clicking on the drop-down arrow to open the User Data dialog. Enter the Display Name, modify the Width and Color if desired, and enter the appropriate information in the User Data field. Then click OK to return to the Schedule Manager dialog. For more information, click here.
