
Using Background Images as Textures
Background Images can be used as textures to lend realism to your rendered project. This can be done automatically for plan view images such as those captured from Google Earth, or images can be simply added to the textures database for later application on your own.
Using the Create Object button
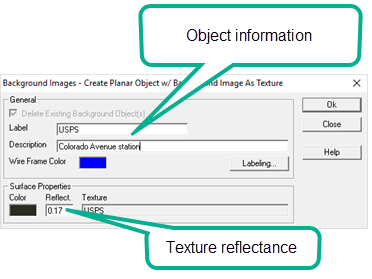
Once you have loaded your background images in the settings dialog, scaled and aligned them, click on the Create Object button. This process will automatically preform the following operations:
|
1. Create a Planar Object (horizontal in Plan View) from your scaled image size. You can create a Label and Description for the object as usual. 2. Create a texture from your image(s). You have the opportunity to adjust the reflectance value of the texture to meet your requirements.
The Delete Existing Background Objects checkbox is not available if this is the first time the object has been created. Subsequent executions of the command will enable the option to delete any previously created objects as you may have changed the extents of your images. An irregular pattern of images will not result in a non-rectangular object. The created object will remain rectangular but will have a background color of black. |
|
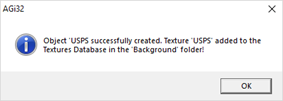
| When you exit the dialog by clicking the OK button AGi32 will display a message informing you of the successful completion of the process. |
|
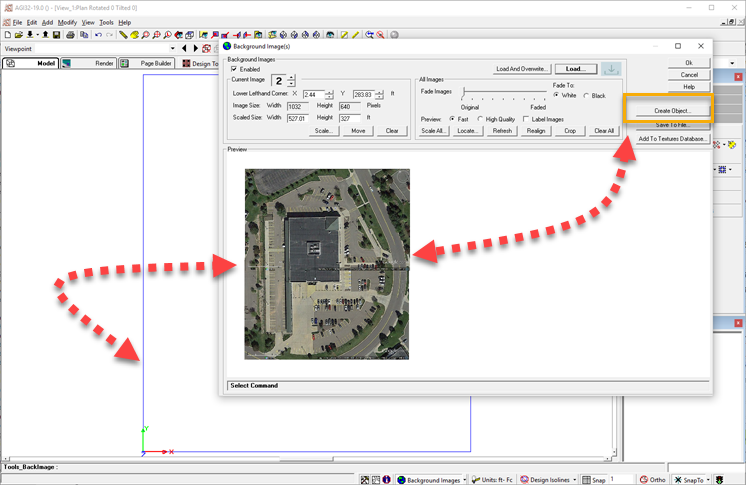
The completed object can be seen behind the Settings dialog.
Using the Save to File button
The Settings dialog also includes the option to save your background image(s) to a file (JPG). Clicking the button opens a Windows Explorer dialog so you can save the file to any location.
The size of the save image (pixels) is equal to the total scaled width and height of all images in pixels. Background color set to black (only seen with non-rectangular composite images)
Using the Add to Textures Database button
This command will allow you to add your image(s) to the textures database but will not create an object to apply them. Enter your own name for the texture, the default is Background. Click OK the complete the process. You can reference the texture separately as usual.
