
Importing Luminaire Location Files
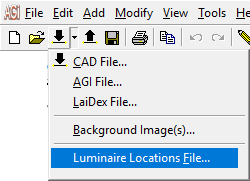
The Import Luminaire Location Files command is available from the File menu Import command or the main toolbar and allows you to import luminaire locations specified in a file created by another application such as MS-Excel, Notepad, Word etc. An example of why you might need this capability are retrofits, audits and site surveys.
File Specifications
- Valid File extensions - .txt or .csv
- Available parameters: Label, X, Y, MH, Orient, Tilt, Roll, Spin, XAimPt, YAimPt, ZAimPt. All parameters are optional
- Valid delimiters: space, tab or comma
- When creating a file in Excel, save as Text (tab delimited) or CSV (comma delimited)
- You can optionally specify column headers as the first row in file. The header must match the available parameter list to be recognized. You will have the opportunity to map unknown header text.
- AGi32 will automatically map certain text to recognized column headers:
Mapped to Label: Luminaire, Type, Label
Mapped to X: XCoord, X-Coord, X-Coordinate, X
Mapped to Y: YCoord, Y-Coord, Y-Coordinate, Y
Mapped to MH: ZCoord, Z-Coord, Z-Coordinate, Z
Mapped to Orient: Orientation, Orient
Mapped to XAimPt: XAimpt, X-AimPt, X-Aim
Mapped to YAimPt: YAimpt, Y-AimPt, Y-Aim
Mapped to ZAimPt: ZAimpt, Z-AimPt, Z-Aim
Mapped to < Ignore>: < Ignore >, Ignore, Blank
Workflow
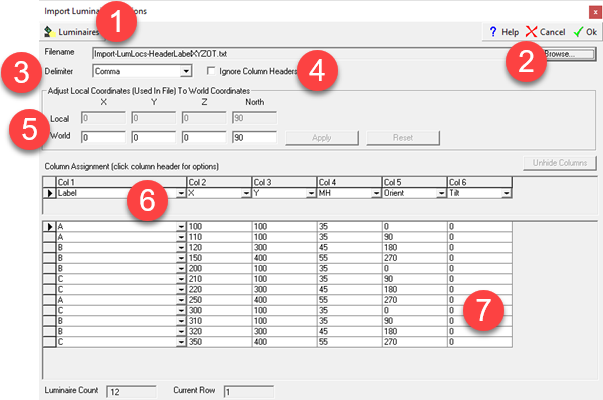
- You must have luminaire definitions in the AGi32 file either prior to import, or they can be defined while in the import dialog (via Luminaire command). It is easiest if you use the correct labels in advance so the locations automatically match, although this is not a requirement (next bullet).Select the file to be imported (.txt or .csv),
- Browse for the file to import.
- Select the proper Delimiter (you will be able to tell when data is separated correctly into columns).
- If column headers exist in the file but are not automatically mapped (see specification above), you can choose to ignore them using the Ignore Column Headers checkbox. You can then reassign them (next step).
- You can adjust the coordinate system used in the file to match the coordinates and alignment used in the AGi32 file. (See Adjust Coordinates below).
- If column headers are not specified in the file to be imported you can easily specify them via Column Assignment. Assign the proper column parameter via the column button. (See Column Headers below).
- You can edit parameters in the grid before import (e.g. assign label, correct problems, change value, etc.).
NOTES:
- If you are referencing primary aiming angles (orient and tilt) you cannot specify aiming points. The inverse is also true.
- The import process can handle malformed grids (missing columns in some rows). Missing data is displayed as blank. You will need to fill in the blanks in the grid prior to import.
- If you need to add or remove locations (rows), edit the file prior to import.
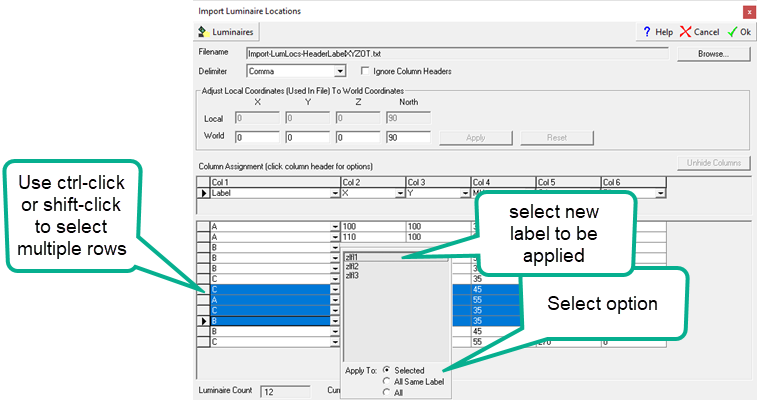
Reassigning Luminaire Labels
You can reassign Labels if necessary. To bulk edit Label, select the rows to edit using shift-click or ctrl-click, then click on the button in Label column and select desired Label. You can choose to apply the change to the selected rows, or all of the same label (only select one row), or All rows.
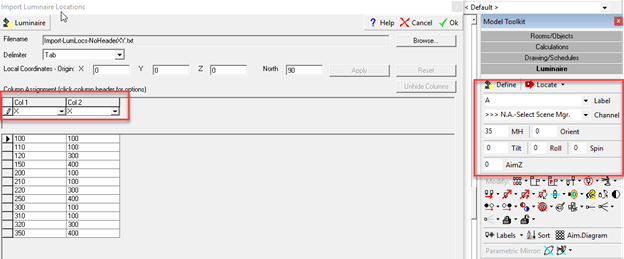
Unassigned Parameters
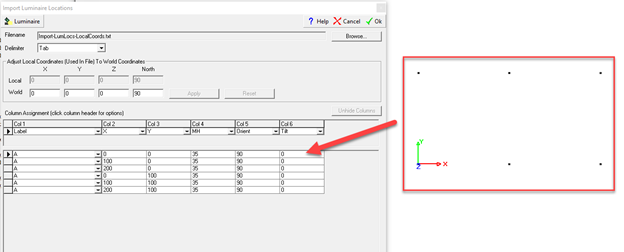
Any unassigned parameters will be set to currently specified values in the Luminaire Toolkit. For example: Only X and Y specified in import file. All locations will be assigned to Label, MH and Aiming Parameters specified in Luminaire Toolkit. In this case, Label = A, MH = 35, etc. (below).
Column Assignments
You can select < Ignore > to ignore (not import), a selected column. If the parameter is ignored or not specified, it will be set = value currently specified in Luminaire Toolkit except aiming points which are set = 0
Column menu sort – Sort grid by current column (alternating ascending/descending). This i s helpful when you want to change the Label for particular group of luminaires
Column menu hide – Hides current column. Has the same effect as assigning < Ignore > to the column. Click Unhide Columns to unhide all hidden columns
Adjust Coordinates
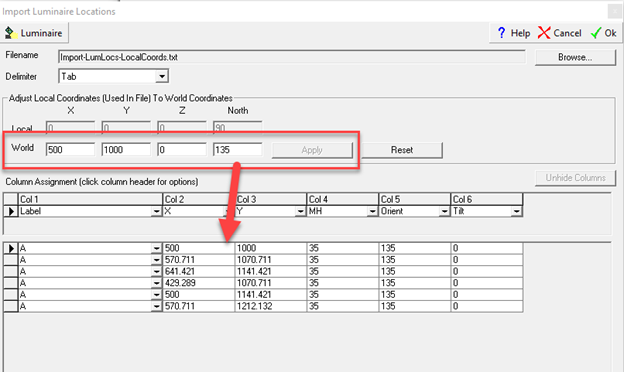
You can adjust Local Coordinates (used in imported file) to World Coordinates (AGi32). This allows you to adjust the coordinates and aiming of all luminaires in the file.
- After making a change to World Coordinates select Apply to see the effect of the adjustment.
- Select Reset to reset back to default World Coordinates (same as Local Coordinates).
IMPORTANT: Apply reloads the data and applies the World Coordinate adjustments. Therefore, you should make all grid adjustments or changes AFTER applying the World Coordinates adjustment! Recommended process:
- Load file (Browse)
- Select proper Delimiter
- Adjust Local Coordinates to World Coordinates (Apply)
- Adjust columns and luminaire data as needed
- Import (Ok)
Example:
Actual site location is offset and rotated:
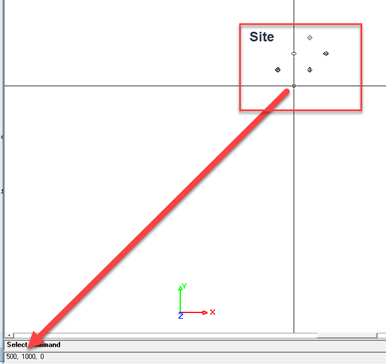
To facilitate a survey, the user creates a local axis (origin) and measures all locations relative to the that axis
When importing, the user can adjust the local coordinates used in the file to world coordinates:
File Examples
• Example #1: Contents - Label, X, Y, MH, Orient and Tilt w/ column headers. All other parameters (Roll and Spin) will be set to values specified in Luminaire Toolkit
Label,x,y,mh,orient,tilt
A,100,100,35,0,0
A,110,100,35,90,0
a,120,300,45,180,0
:
• Example #2: Contents - Label, X, Y, MH, Orient and Tilt w/o column headers. Will need to assign columns. All other parameters (Roll and Spin) will be set to values specified in Luminaire Toolkit
A,100,100,35,0,0,0,0
A,110,100,35,90,0,0,0
a,120,300,45,180,0,,0
:
• Example #3: Contents – X, Y, MH, MIsc1 and Misc2 w/o column headers. Will need to assign columns. Can optionally hide and set column to < ignore> for non-relevant columns (Misc1 and Misc2). All other parameters (Label, Orient, Tilt, Roll and Spin) will be set to values specified in Luminaire Toolkit
210, 100, 35, Misc Data, Misc Data2
220, 300, 45, Unsued, Unused2
350, 400, 55, Stuff, More Stuff
: